Crispy Chickpeas Garbanzo Beans Recipe
Equipment
- Rimmed Baking Sheet
- Parchment Paper
- Clean Kitchen Towel
Ingredients
The Base
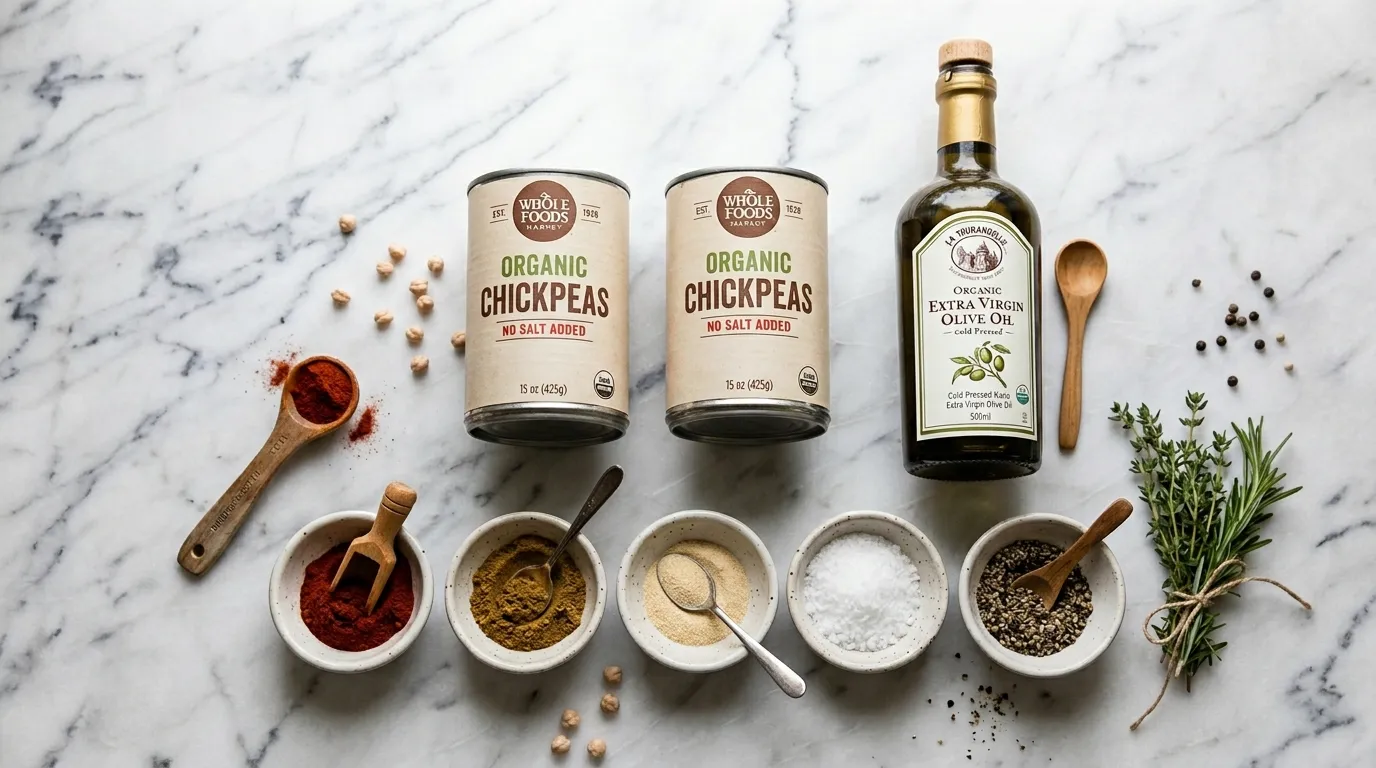
- 2 cans chickpeas (15-oz each) rinsed and dried thoroughly
- 2 tablespoons extra virgin olive oil
The Spice Blend
- 1 teaspoon smoked paprika
- 1 teaspoon ground cumin
- 0.5 teaspoon garlic powder
- 0.5 teaspoon kosher salt added after roasting
- 0.25 teaspoon black pepper
Instructions
- Phase 1: Prep Work. Preheat your oven to 400°F (200°C). Line a large, heavy-duty rimmed baking sheet with parchment paper. Pour the canned beans into a colander and rinse thoroughly under cold water. Transfer to a clean kitchen towel and gently rub them dry. Let them air-dry for at least 15 minutes.
- Phase 2: Cooking the Base. Transfer the bone-dry beans directly onto the parchment-lined baking sheet. Drizzle with the extra virgin olive oil (do not add spices yet). Toss vigorously until glossy, then spread into a single, even layer without overcrowding.
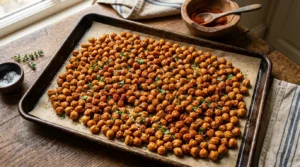
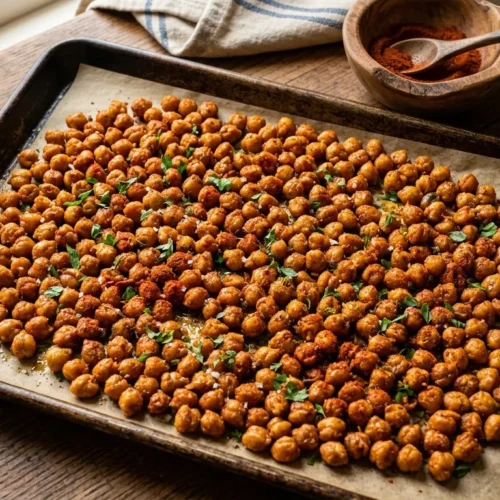
- Phase 3: Finishing Touches. Roast in the center rack for 20 minutes, shaking the pan halfway through. Once they are golden brown and sound like pebbles rattling against the pan, remove them from the oven. Immediately sprinkle with smoked paprika, cumin, garlic powder, kosher salt, and black pepper. Toss well to coat using the residual heat to bloom the spices.
Notes
The smell of smoked paprika, earthy cumin, and garlic blooming in warm olive oil is usually enough to pull my entire family into the kitchen. But when they hear the distinct, crackling sizzle of legumes hitting a hot baking sheet, they know exactly what is coming. If you are looking for a snack or side dish that delivers a loud, satisfying crunch on the outside with a creamy, melt-in-your-mouth center, you have finally found it.
This chickpeas garbanzo beans recipe is the best thing I ate all week, and it completely transformed how I treat basic pantry staples. For years, I struggled with roasted beans that turned out chewy or mushy. After countless kitchen tests, I cracked the code. By manipulating moisture and mastering oven temperatures, we unlock a crispy exterior that rivals your favorite roasted nuts. My family literally fights over the last crispy piece right off the pan before it even makes it to the serving bowl!
Why You’ll Love This chickpeas garbanzo beans recipe
There is a science to getting that perfect, shattering crunch without burning the spices. Here is exactly why this method works every single time:
- Moisture Control: We use a specific towel-drying technique that removes the residual aquafaba (bean liquid), ensuring the oil clings directly to the skin to fry it, rather than steam it.
- Optimal Heat Distribution: Roasting at a high temperature of 400°F (200°C) flash-crisps the exterior while keeping the starchy inside beautifully tender.
- Post-Roast Seasoning: We hold back the salt and delicate spices until the very end. Salt draws out moisture, which is the enemy of crispiness during the cooking process.
- One-Pan Cleanup: Everything happens on a single rimmed baking sheet, meaning you spend less time washing dishes and more time enjoying your food.
Ingredients & Substitutions
You do not need a massive grocery haul to make something incredible. The foundation of this chickpeas garbanzo beans recipe relies on just a few high-quality pantry staples.
The Legumes
You will need two 15-ounce cans of chickpeas. When looking for a foundational garbanzo beans recipe, starting with canned legumes saves you hours of soaking and boiling. I prefer organic canned varieties because they tend to have a firmer texture. If you want to use dried beans, you absolutely can! Just soak them overnight and boil them with a pinch of baking soda until tender but not falling apart, then cool them completely before proceeding.
Extra Virgin Olive Oil
Do not skimp here. Because this recipe uses so few ingredients, the flavor of the oil takes center stage. I use a robust, cold-pressed extra virgin olive oil. It coats the beans perfectly and adds a rich, peppery background note. You need exactly two tablespoons—enough to coat them, but not so much that they drown and become greasy.
The Spice Blend
Most garbanzo bean recipes fail because they use old, stale spices that have been sitting in the cabinet for years. Fresh spices make a world of difference.
- Smoked Paprika: Adds a deep, woodsy flavor that mimics the taste of something roasted over an open fire.
- Ground Cumin: Provides an earthy, warm baseline.
- Garlic Powder: I use powder instead of fresh minced garlic because fresh garlic will burn and turn bitter at 400°F.
- Kosher Salt & Black Pepper: Kosher salt has wider flakes that adhere beautifully to the oily exterior of the roasted beans.
Substitutions & Flavor Variations
The beauty of a great garbanzo bean recipe is its versatility.
Spicy Kick:* Add half a teaspoon of cayenne pepper or chili flakes to the spice mix.
Herbaceous:* Swap the cumin and paprika for dried oregano, basil, and a sprinkle of parmesan cheese (or nutritional yeast for a dairy-free/vegan option) right out of the oven.
Sweet & Cozy:* Skip the savory spices entirely. Toss the roasted beans in a mixture of cinnamon, a pinch of nutmeg, and a tablespoon of maple syrup during the last two minutes of baking.
How to Make This chickpeas garbanzo beans recipe
Achieving the ultimate crunch requires a little bit of technique. Follow these phases closely, and you will never eat a soggy roasted bean again.
Phase 1: Prep Work
The most crucial step in this chickpeas garbanzo beans recipe happens before the heat is even turned on. Preheat your oven to 400°F (200°C). Line a large, heavy-duty rimmed baking sheet with parchment paper.
Pour your canned beans into a colander and rinse them thoroughly under cold water until the water runs completely clear and all the foamy aquafaba is gone. Next, lay a clean, lint-free kitchen towel flat on your counter. Pour the rinsed beans onto the towel, fold the other half over them, and gently rub them back and forth.
Chef’s Tip: Moisture is the absolute destroyer of crispiness. Let the beans air-dry on the towel for at least 15 minutes. If you see any translucent skins peeling off during the drying process, discard them.
Phase 2: Cooking the Base
Transfer your bone-dry beans directly onto the parchment-lined baking sheet. Drizzle them with the extra virgin olive oil. At this stage, do not add your spices or salt.
Using your hands, toss the beans vigorously until every single one is slick and glossy with oil. Spread them out into a single, even layer. If they are overlapping, they will steam each other.
Chef’s Tip: Don’t overcrowd the pan. If you are doubling the recipe, use two separate baking sheets. Space allows the hot oven air to circulate around each individual bean, creating that 360-degree crunch.
Phase 3: Finishing Touches
Place the baking sheet in the center rack of your preheated oven. Roast for 20 minutes. At the 20-minute mark, pull the pan out and give it a good shake to roll the beans around, ensuring they brown evenly on all sides. Return them to the oven for another 10 to 15 minutes.
You will know they are ready when they have shrunk slightly, turned a deep golden brown, and sound like little pebbles rattling against the pan when you shake it.
Remove the pan from the oven. While the beans are still sizzling hot and glistening with oil, immediately sprinkle over your smoked paprika, cumin, garlic powder, and kosher salt. Toss well to coat. The residual heat will toast the spices instantly, blooming their essential oils without burning them—a technique that makes this chickpeas garbanzo beans recipe stand out from the rest.
Expert Tips for Perfect Results
If you want to take this dish from “Good” to “Restaurant Quality,” keep these advanced culinary secrets in mind:
- Peel the Skins: I know it sounds tedious, but if you have an extra 10 minutes, gently pinch each bean to pop off its thin, translucent skin before roasting. Skinless beans roast up significantly crispier because there is no barrier trapping moisture inside.
- The Oven-Cooling Trick: For an earth-shattering crunch, turn the oven off once the beans are done roasting. Crack the oven door open a few inches and let the pan sit inside as the oven cools down for about 15 minutes. This gently dehydrates them further without burning them.
Never Salt Early: I cannot stress this enough. Salting raw vegetables or legumes draws out water through osmosis. If you salt before roasting, you create a puddle of water on your baking sheet. Always salt immediately after* roasting.
Storage & Reheating
If you miraculously have leftovers, knowing how to store your chickpeas garbanzo beans recipe leftovers is vital for maintaining their texture.
Storage: Never put roasted crispy beans in an airtight plastic container or a zip-top bag. The trapped air will soften them within hours. Instead, let them cool completely to room temperature, then store them in a glass jar or bowl loosely covered with a paper towel. They will stay crunchy on the counter for about 2 to 3 days.
Reheating: If they do lose their crunch due to humidity, do not microwave them! A microwave will turn them into rubber. To revive them, toss them into a dry skillet over medium heat for 3 to 4 minutes, shaking constantly, or pop them in an air fryer at 350°F for 2 minutes.
Serving Suggestions
While I usually eat these straight off the pan by the handful, they are incredibly versatile.
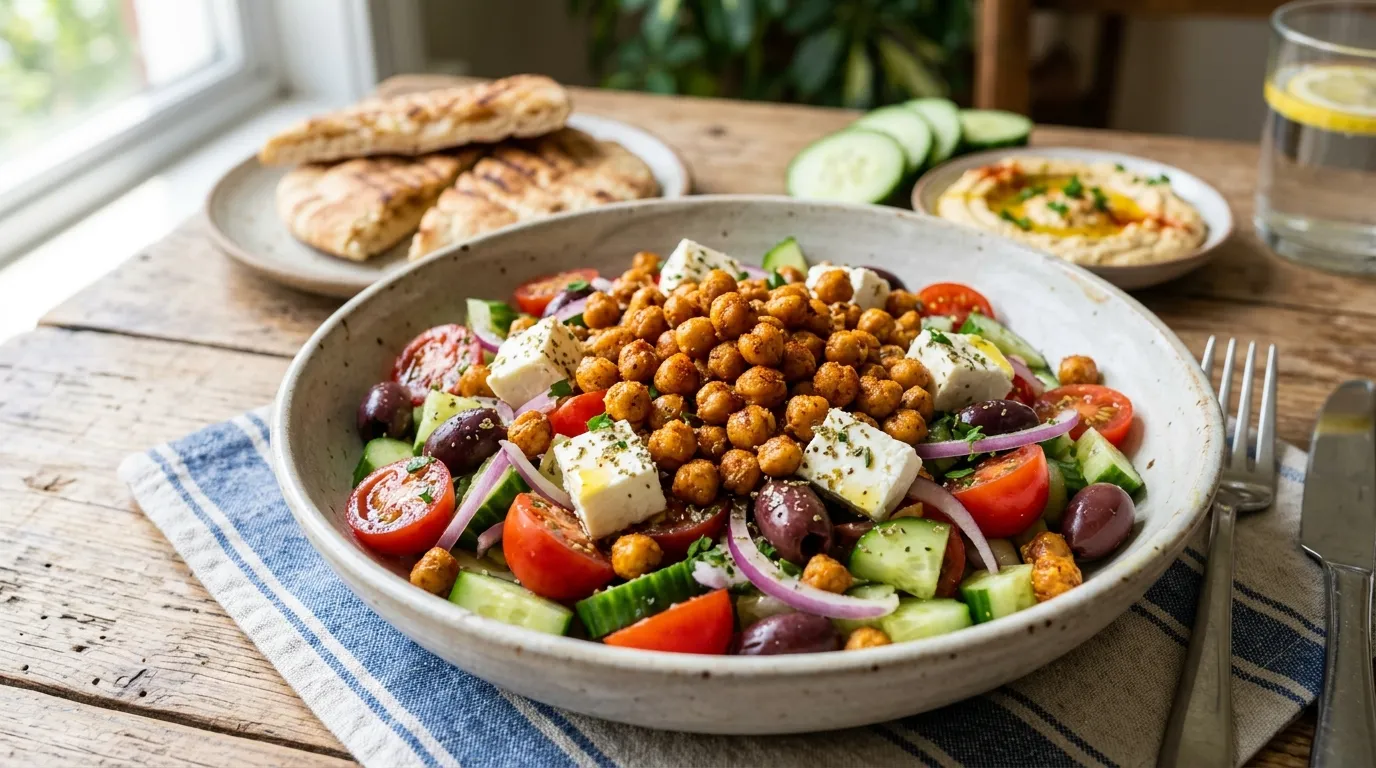
They make a brilliant, gluten-free crouton substitute for a classic Caesar salad or a vibrant Greek salad. You can also scatter them over a bowl of creamy hummus for a beautiful textural contrast, or tuck them into warm pita bread with grilled chicken, tzatziki, and fresh cucumbers.
If you are expanding your legume repertoire and want a cozy, Mediterranean-inspired dinner, I highly recommend serving these crispy bites alongside a rich, brothy ceci beans recipe that my family absolutely adores. The contrast between the slow-simmered, tender beans in the stew and the loud crunch of these roasted ones is a match made in culinary heaven.
Conclusion
I truly hope this chickpeas garbanzo beans recipe becomes a weekly staple in your kitchen just like it is in mine. It is affordable, packed with plant-based protein, and delivers that deeply satisfying crunch we all crave. Once you master the simple techniques of drying the beans and seasoning after roasting, the flavor possibilities are endless.
Did you make this? Rate the recipe below and let me know in the comments what spice blend you used!
Common Questions About This chickpeas garbanzo beans recipe
Why did my roasted beans turn out chewy instead of crispy?
The most common culprit for a chewy texture is excess moisture. If the beans were not dried thoroughly on a towel before roasting, or if they were overcrowded on the baking pan, they steamed instead of roasted. Additionally, ensure your oven is fully preheated to 400°F before the pan goes in.
Can I make this ahead of time for a party?
While they are at their absolute peak crispiness within the first two hours of coming out of the oven, you can make them a day ahead. Just be sure to store them loosely covered at room temperature. If they soften, simply crisp them up in a hot oven for 5 minutes right before your guests arrive.
Is it necessary to use extra virgin olive oil?
For the best flavor, yes. However, if you are out of olive oil, avocado oil is a fantastic substitute. It has a high smoke point and a neutral flavor that allows the spices to shine. Avoid using butter, as the milk solids can burn at high temperatures and the water content in butter will hinder the success of your chickpeas garbanzo beans recipe.
Can I use an air fryer instead of an oven?
Absolutely! The air fryer is basically a countertop convection oven and works wonders for this. Air fry the dried, oiled beans at 390°F for 12 to 15 minutes, shaking the basket halfway through. Toss with your spices and salt immediately after removing them from the basket.
Are canned beans as healthy as dried beans?
Yes, canned beans are incredibly nutritious and retain their fiber and protein content. The main difference is sodium. Canned beans are often stored in salted water, which is why rinsing them thoroughly under cold water is a vital step before you begin cooking.