Microwave Baked Potato: The Amazing 5-Minute Trick
Equipment
- Microwave
- Fork
- Microwave-safe plate
Ingredients
Main Ingredients
- 1 medium Russet potato scrubbed clean
- 1 tsp olive oil
- 1/2 tsp kosher salt
- 1/4 tsp black pepper freshly cracked
Instructions
- Wash the Russet potato thoroughly and pat it completely dry with a paper towel.
- Pierce the potato skin deeply 5 to 6 times on all sides with a fork to allow steam to escape.
- Place the potato on a microwave-safe plate, rub with olive oil, and season with salt and pepper.
- Microwave on high for 5 minutes. If it’s a very large potato, you may need an extra 1-2 minutes.
- Let the potato rest for 1 minute before slicing open and fluffing the interior with a fork.
Notes
Let’s be honest—is there anything more comforting than a perfectly microwave baked potato, steaming hot and ready for all your favorite toppings? But that hour-long wait for the oven to work its magic? On a busy evening, it can feel like an eternity.
What if I told you the secret to a perfect baked potato with a pillowy, fluffy interior is just five minutes away?
This simple method isn’t a compromise; it’s a complete game-changer. It has become my absolute favorite kitchen trick for whipping up a fast side dish or a satisfyingly healthy lunch idea in virtually no time at all. Forget preheating the oven—get ready to meet your new favorite weeknight hero.
Why You’ll Love This 5-Minute Method
This isn’t just about saving a little time; it’s about completely transforming how you see the humble potato. When you need a satisfying and warm meal without the wait, this trick is your new best friend. Here’s exactly why you’ll fall in love with it.
- Incredibly Fast: The most obvious win! Go from a raw potato to a perfectly fluffy, ready-to-eat base in about five minutes. This makes it the ultimate quick potato recipe when hunger strikes now, not an hour from now.
- Wonderfully Energy-Efficient: Why heat up your entire kitchen for one or two potatoes? This method of energy-efficient cooking uses a fraction of the power compared to a conventional oven, which is great for your utility bill and perfect for hot summer days.
- The Perfect Easy Weeknight Meal: We all have those evenings when cooking feels like a monumental task. This recipe is your ace in the hole—a reliable, comforting, and nearly effortless solution for a solo dinner or a fast side dish for the family.
- Foolproof & Consistent: No more guessing games. By following a few simple steps, you get a tender, evenly cooked potato every single time. It’s a simple, reliable process that delivers delicious results without the fuss.
The Simple Ingredients You’ll Need
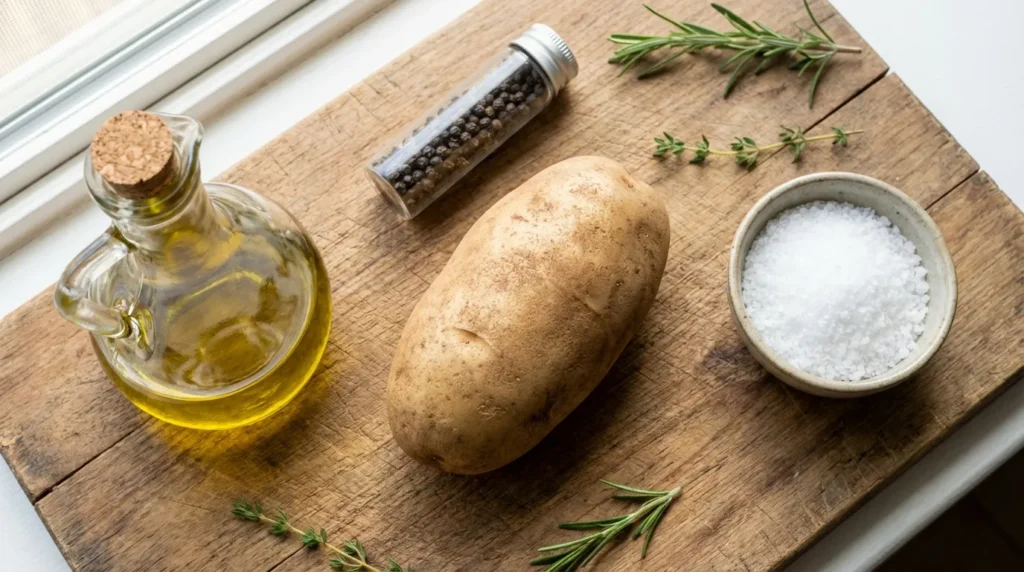
You won’t need a long shopping list for this amazing 5-minute trick; the magic comes from using a few quality basics to create something truly delicious. The most important choice you’ll make is the potato itself.
For that signature, cloud-like fluffy interior, a Russet potato is the undisputed champion. Its high starch content and naturally thick skin, as noted for the variety, are what allow it to steam perfectly from the inside out, yielding that wonderful texture we’re all after.
Here is your short and simple list:
- One Medium Russet Potato: Look for one that’s around 8-10 ounces. It should feel heavy for its size with taut, even skin. Think of it as the perfect blank canvas for your meal.
- A Drizzle of Olive Oil: We’re talking just a teaspoon. This light coating prevents the skin from drying out and gives the seasonings something to cling to.
- Coarse Salt and Black Pepper: I always reach for kosher salt here. Its larger flakes create delightful little pockets of savory flavor on the skin. A few cranks of fresh pepper complete the essential seasoning.
- Your Dream Toppings: This is where you get to be creative! Whether it’s a classic pat of butter and a dollop of sour cream or a sprinkle of sharp cheddar and chives, have your favorites ready to go.
The 5-Minute Method: Step-by-Step
This is where the magic happens, and it couldn’t be easier. We’ll walk through this together, and in just a few moments, you’ll be ready to enjoy your delicious creation.
1. The Prep: Wash and Dry
Begin by giving your potato a thorough rinse under the tap. Scrub away any lingering soil from the skin. Once it’s clean, the next move is crucial: dry it completely with a clean towel. A perfectly dry surface is what helps the oil and seasoning adhere beautifully to the skin, creating a better final result.
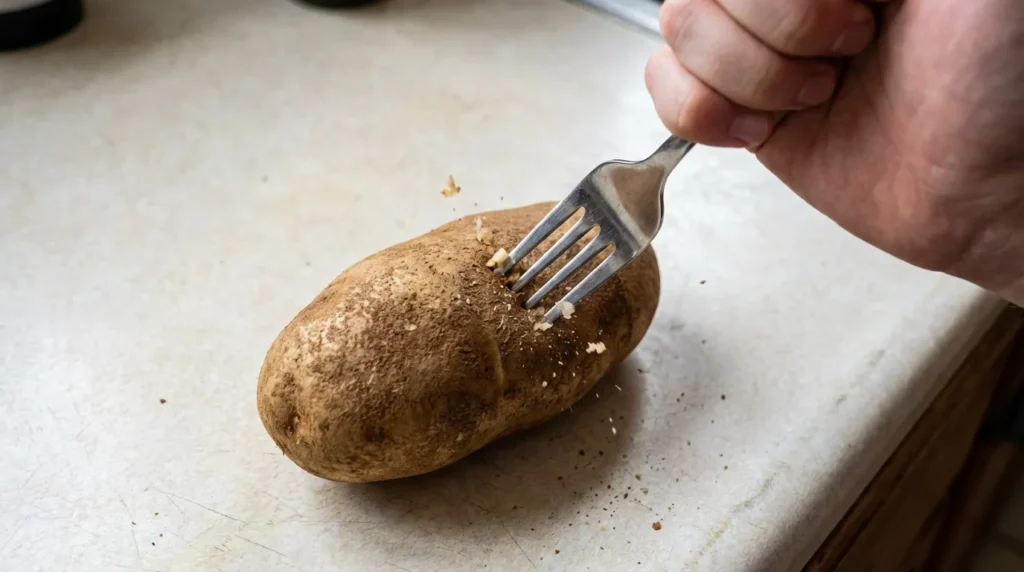
2. The Crucial Safety Step: Vent the Potato
Now, for the single most important action: grab a fork and give the potato several deep pokes on all sides. These holes are essential escape routes for the steam that will build up inside as it cooks. This simple step is the secret to preventing a potato pressure bomb in your microwave!
3. The Seasoning: Oil and Salt
Set your vented potato on a microwave-safe plate. Pour over the olive oil and give it a good rub, coating the entire skin. Then, give it a generous shower of kosher salt and a few turns of black pepper. This doesn’t just flavor the potato; it helps draw out a bit of moisture from the skin.
4. The Cook: Power and Time
Pop the plate into the microwave and cook on full power for an initial five minutes. The ideal cooking time can differ slightly depending on the size of your potato and your specific microwave wattage, so a quick check is a good idea.
- How to check for doneness: Carefully take the plate out. Using a towel to protect your hand, give the potato a gentle squeeze. If it feels soft and yields easily, it’s done! If a fork can slide effortlessly into the thickest part, you’ve reached perfection.
- If it needs more time: Should it still feel a bit firm in the center, just flip it over and cook for another 60 seconds before checking again.
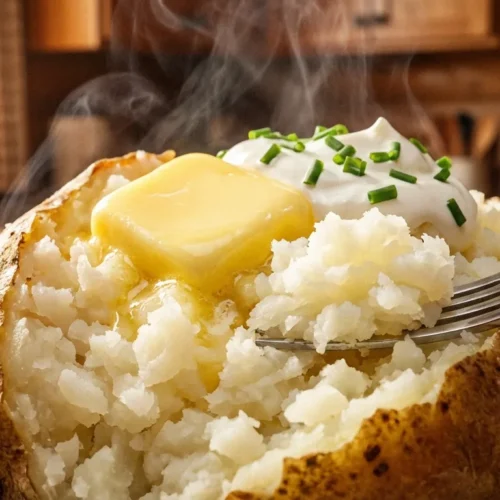
5. The Finish: Rest and Fluff
Let your perfectly cooked potato sit for one minute before you cut into it. This brief pause allows the residual heat to work its final magic, creating an incredibly tender, fluffy potato from the inside out. From there, slice it down the middle, fluff that perfect interior with your fork, and get ready for the toppings.
Pro Tips and Variations to Elevate Your Potato
The basic 5-minute method is a lifesaver, but with a few extra tricks, you can take your microwave baked potato from simply “fast” to absolutely “fantastic.” Here are my favorite ways to customize and perfect it.
The Ultimate Secret to Crispy Skin
Let’s be real: the one thing a microwave can’t do is create that classic, oven-baked crispy skin. But we can fix that in just 2-3 extra minutes! The microwave does the heavy lifting of cooking the inside perfectly, and a quick blast of intense heat afterwards is all you need to finish the job.
- Under the Broiler: This is my go-to method. After the potato is cooked through, place it on a baking sheet and pop it under your oven’s broiler for 2-3 minutes. Keep a close eye on it! It will crisp up very quickly, giving you that delightful texture you crave.
- In an Oven or Air Fryer: No broiler? No problem. A few minutes in a hot oven (around 425°F or 220°C) or an air fryer will also do the trick beautifully.
Cooking for a Crowd?
Making more than one potato? It’s easy! Just add about 2-3 minutes of cooking time for each additional potato. For the best results, arrange them in a circle on your microwave-safe plate, leaving a bit of space between them so they cook evenly. Remember to flip them all halfway through.
Try a Sweet Potato Variation
This technique isn’t just for Russets! It works wonderfully for a medium-sized sweet potato, too. Follow the exact same steps of piercing, oiling, and seasoning. A sweet potato often cooks a minute or two faster, so start checking it for doneness around the 4-minute mark.
Spice Up Your Seasoning
While salt and pepper are classic, don’t be afraid to get creative before you even press start. Try rubbing the skin with a pinch of:
- Garlic Powder
- Smoked Paprika
- Your favorite all-purpose seasoning blend
Serving Suggestions: Dress Up Your Potato
Now for the fun part! Your perfectly fluffy potato is a blank canvas just waiting for your creative touch. Whether you’re craving classic comfort or a full-blown meal, here are some of my favorite ways to serve it.
For the Classic Experience:
You can never go wrong with the timeless combinations. These are classics for a reason—they are pure, simple, and delicious.
- The Trio: A generous pat of melting butter, a cool dollop of sour cream, and a fresh sprinkle of finely chopped chives.
- Cheesy Delight: Load it up with sharp shredded cheddar cheese while it’s piping hot so it gets wonderfully melty, then top with crispy bacon bits.
- Simple & Fresh: A swirl of butter, a pinch of salt, and a handful of freshly sliced green onions.
Turn It Into a Loaded Baked Potato Meal:
This is where your 5-minute side dish transforms into a satisfying main course. It’s the ultimate healthy lunch idea or a super-fast weeknight dinner.
- Chili Cheese Potato: Spoon over a hearty portion of your favorite chili (canned or homemade) and top with shredded cheese and a dollop of sour cream or Greek yogurt.
- Broccoli & Cheese: Steam some broccoli florets (you can even do this in the microwave!) and pile them on with a creamy cheese sauce or melted cheddar for a veggie-packed meal.
- BBQ Pulled Pork: Top your potato with warm pulled pork and a drizzle of your favorite BBQ sauce for a truly substantial and flavorful dinner.
Conclusion: Your New Kitchen Superpower
And there you have it! The next time a craving for a warm, comforting baked potato strikes, you no longer have to glance at the clock with a sigh. You now hold the secret to a perfect baked potato, and it’s a game-changing 5-minute trick.
This simple method is more than just a recipe; it’s your new secret weapon for conquering busy weeknights and last-minute hunger pangs. It proves that delicious, satisfying food doesn’t always require a long wait. If you’re looking to follow up this quick meal with something sweet yet nutritious, be sure to browse our favorite healthy dessert recipes for the perfect balanced finish.
Enjoy the wonderful world of instant gratification—your dinner routine will never be the same!
Frequently Asked Questions (FAQs)
It’s natural to have a few questions when trying a new kitchen trick. Here are answers to some of the most common ones I get about this amazing method.
1. What’s the best type of potato for the microwave?
Without a doubt, the Russet potato is your best friend here. Its high starch content and low moisture are the secret to achieving that signature light and fluffy interior. While other potatoes like Yukon Golds will work, they tend to have a creamier, denser texture when microwaved.
2. Help! Why did my potato explode?
That’s a scary but easily preventable issue! A potato explodes in the microwave when steam builds up inside with no way to get out. This is why piercing the skin deeply with a fork all over is the most critical step. Those little holes act as vents, allowing the steam to escape safely during the cooking time.
3. Is it possible to get crispy skin in the microwave?
The microwave itself cooks by steaming the potato from the inside out, so it won’t produce a crispy skin on its own. However, you can easily get that perfect finish! As mentioned in the Pro Tips, just pop the fully cooked potato under your oven’s broiler or into a hot air fryer for 2-3 minutes. This gives you the best of both worlds: a speedy cook time and a deliciously crisp finish.
4. Can I cook more than one potato at once?
Absolutely! Just be sure to increase the cooking time. A good rule of thumb is to add about 2 to 3 minutes for each additional potato. Arrange them in a circle on your plate, leaving some space between them, and be sure to flip them all halfway through to ensure they cook evenly.