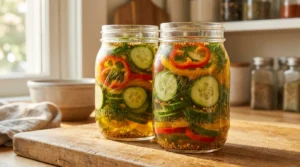
Tangy & Crunchy Pickles and Peppers Recipe
Equipment
- Large Colander
- Non-reactive Saucepan (Stainless Steel or Enamel)
- 2 Wide-Mouth Pint Jars
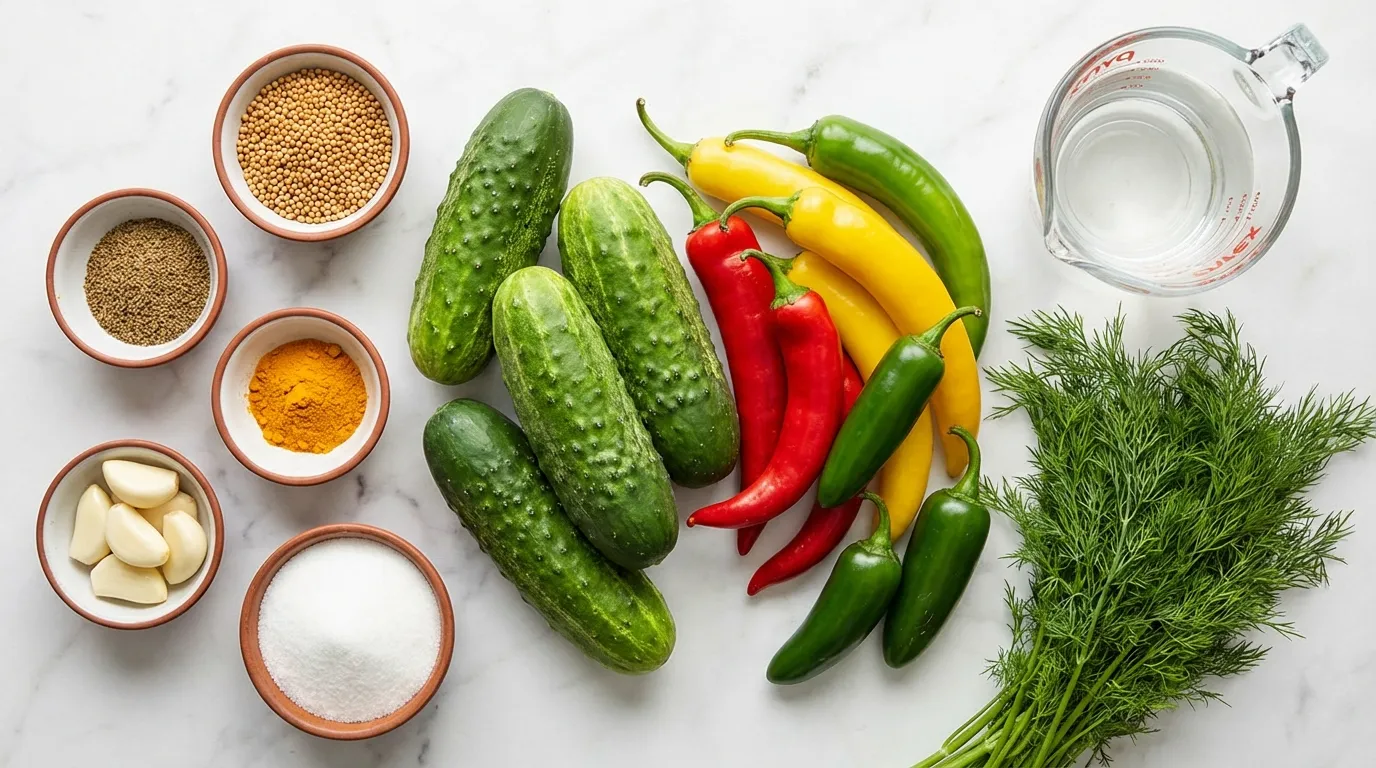
Ingredients
The Vegetables
- 1 lb Kirby cucumbers (pickling cucumbers) washed, blossom ends removed, sliced into 1/4 inch coins
- 2 cups Peppers (Banana Peppers, Jalapeños, or Bell Peppers) sliced into rings
The Salt Soak
- 1 tbsp Kosher salt
- 1 cup Ice cubes
The Brine & Aromatics
- 1 cup Distilled White Vinegar
- 1 cup Apple Cider Vinegar
- 1 cup Granulated white sugar
- 1.5 tbsp Kosher salt for the brine
- 1 tsp Mustard seeds
- 1 tsp Celery seeds
- 0.25 tsp Turmeric for color
- 4 sprigs Fresh dill
- 4 cloves Garlic smashed and peeled
Instructions
- Wash and Trim: Thoroughly wash cucumbers and peppers. Slice off the ‘blossom end’ of the cucumbers to prevent softening enzymes from ruining the texture.
- Slice: Cut cucumbers into 1/4 inch coins and peppers into rings. Remove pepper seeds if you prefer less heat.
- The Salt Soak (Crucial Step): Place vegetable slices in a colander over a bowl. Toss with 1 tablespoon of kosher salt and the ice cubes. Let sit for 30–45 minutes to draw out excess moisture.
- Rinse: Rinse the vegetables thoroughly with cold water to remove the salt, then pat completely dry with paper towels.
- Make the Brine: In a non-reactive saucepan, combine white vinegar, apple cider vinegar, sugar, salt (1.5 tbsp), mustard seeds, celery seeds, and turmeric.
- Simmer: Bring to a boil over medium-high heat, stirring until sugar dissolves. Reduce heat and simmer for 2 minutes to bloom spices.
- Pack Jars: Divide fresh dill and garlic between two clean pint jars. Pack the cucumber and pepper slices tightly into the jars.
- Pour Brine: Pour the hot brine over the vegetables, leaving 1/2 inch of headspace. Tap jars gently to release air bubbles.
- Cool and Store: Let jars cool to room temperature, then seal and refrigerate. For best flavor, wait at least 24 hours before eating. Keeps for up to 2 months.
Notes
There is a specific sound that brings joy to any chef’s heart: the sharp snap of a perfectly preserved cucumber. When I was coming up in professional kitchens, the “gardemanger” (pantry) station was always my favorite place to be because that’s where the pickling magic happened. There is something deeply satisfying about taking raw, humble produce and transforming it into a zesty, crunchy condiment that wakes up the palate. If you have been searching for the ultimate condiment to upgrade your sandwiches, this pickles and peppers recipe is about to become a permanent fixture in your refrigerator door.
Unlike the neon-green jars you find in the supermarket aisle, which are often laden with artificial dyes and preservatives, this homemade version is vibrant, fresh, and unapologetically bold. It balances the earthy sweetness of bell peppers (or the heat of jalapeños) with the cooling crunch of cucumbers. I’ve tweaked the brine ratios over the years to ensure it’s not just sour, but complex. Whether you are prepping for a weekend barbecue or just want to elevate a Tuesday night burger, this pickles and peppers recipe is the secret weapon you didn’t know you needed.
Why You’ll Love This Pickles and Peppers Recipe
I developed this specific method because I realized that most home cooks are intimidated by the idea of “canning.” They think they need a boiling water bath, specialized tongs, and a degree in chemistry. You don’t. Here is why this recipe works so well:
- No Canning Required: This is a “refrigerator pickle.” We rely on the acidity of the vinegar and the cold temperature of the fridge to preserve the texture. No boiling water baths means your vegetables stay crispier.
- The “Ice Bath” Secret: Most recipes result in mushy pickles. I use a chef’s technique involving an ice water and salt soak (osmosis) to draw out excess moisture before the brine hits the veggies. This guarantees a crunch that echoes.
- Customizable Heat: You control the fire. By adjusting the ratio of sweet peppers to hot peppers, you can make this family-friendly or blazing hot.
- Ready Overnight: While they get better with age, this pickles and peppers recipe tastes incredible after just 24 hours of marinating.
Ingredients & Substitutions
To make the best pickled peppers recipe, you have to start with produce that is in its prime. You cannot pickle your way out of bad produce; if the cucumber is soft now, it will be mush later.
- Cucumbers: You must use Kirby cucumbers (often sold as “pickling cucumbers”). They have thick, bumpy skin and smaller seeds, which maintain crunch. Do not use standard “slicing” or English cucumbers; their high water content will dilute your brine and result in a soggy mess.
- Peppers: I prefer a mix. I use Banana Peppers for tang and Jalapeños for heat. If you want zero spice, stick to sliced Bell Peppers (red and orange look beautiful in the jar).
- Vinegar: I use a 50/50 blend of Distilled White Vinegar (for that classic sharp bite) and Apple Cider Vinegar (for a mellow, fruity background note).
- Sugar: A standard granulated white sugar balances the harsh acidity. You can substitute honey, but it will change the flavor profile slightly.
- Mustard Seeds & Celery Seeds: These are non-negotiable for that authentic deli flavor.
- Turmeric: Just a pinch. This isn’t for flavor as much as it is for that appetizing, slight golden hue.
- Fresh Dill & Garlic: Use fresh, not dried. The oils in fresh dill weed bloom beautifully in the warm brine.
- Calcium Chloride (Optional): In the industry, we sometimes use “Pickle Crisp” granules. It’s not strictly necessary if you follow my ice bath step, but it’s an insurance policy for crunch.
How to Make Pickles and Peppers Recipe
This process is fast, but don’t rush the prep. Uniform slicing ensures every piece pickles at the same rate.
Phase 1: The “Crunch” Prep
1. Wash and Trim: Thoroughly wash your cucumbers and peppers. Chef’s Tip: You must slice off the “blossom end” of the cucumber (the end opposite the stem). The blossom end contains an enzyme called pectinase that causes softening. Even a sliver removed helps.
2. Slice Uniformly: Slice your cucumbers into coins about 1/4 inch thick. Slice your peppers into rings, removing seeds if you want less heat.
3. The Salt Soak: Place the cucumber slices and pepper rings in a large colander over a bowl. Toss them with 1 tablespoon of kosher salt and a handful of ice cubes. Let this sit for 30–45 minutes.
Why we do this:* The salt draws out the water from the vegetables’ cells. Less water inside the vegetable means more room for the flavorful brine to soak in, resulting in a much crunchier texture.
4. Rinse and Dry: Rinse the vegetables thoroughly with cold water to remove excess salt, then pat them completely dry with paper towels.
Phase 2: The Brine
1. Combine Ingredients: In a non-reactive saucepan (stainless steel or enamel), combine the white vinegar, apple cider vinegar, sugar, salt, mustard seeds, celery seeds, and turmeric.
2. Simmer: Bring the mixture to a boil over medium-high heat. Stir constantly until the sugar and salt have completely dissolved.
3. Bloom the Spices: Once boiling, reduce heat and let it simmer for 2 minutes. This “blooms” the dried spices, releasing their essential oils.
Phase 3: Assembly
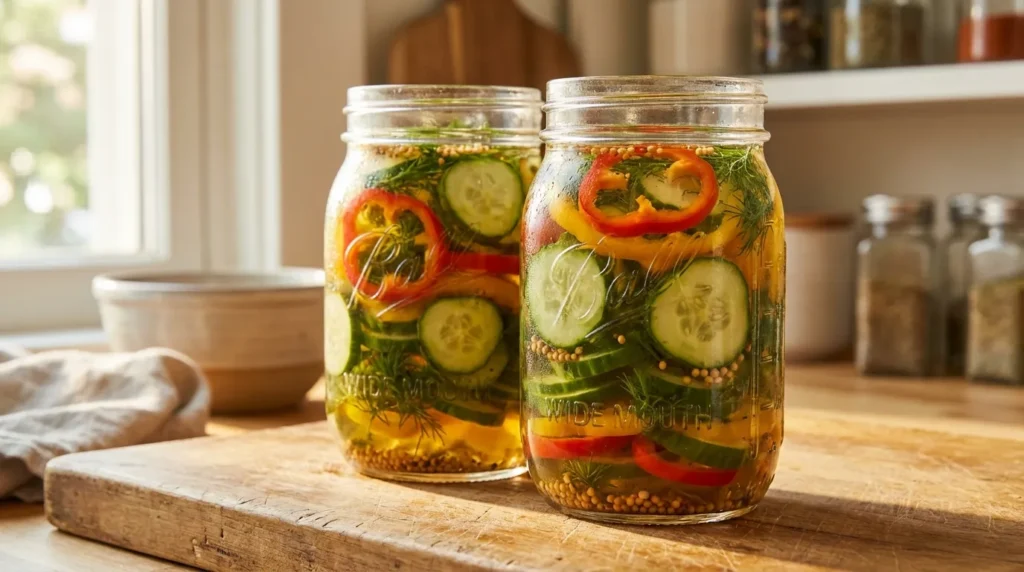
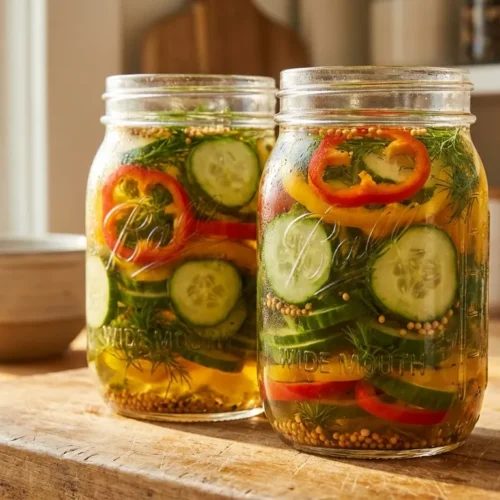
1. Pack the Jars: Take two clean, wide-mouth pint jars. Divide the fresh dill sprigs and smashed garlic cloves between the jars.
2. Layer the Veggies: Pack the cucumber coins and pepper rings tightly into the jars. Really jam them in there; they will shrink slightly as they pickle.
3. The Pour: Carefully pour the hot brine over the vegetables, leaving about half an inch of headspace at the top of the jar.
Chef’s Tip:* Tap the jar gently on the counter to dislodge any trapped air bubbles. Air pockets can lead to spoilage or uneven pickling.
4. Cool Down: Let the jars sit on the counter until they reach room temperature. Do not put hot jars directly into the fridge, as it raises the internal temperature of your appliance and compromises other food.
Expert Tips for Perfect Results
I have made this pickles and peppers recipe hundreds of times, and here are the small nuances that separate a “good” pickle from a “great” one.
- Water Quality Matters: If your tap water smells like chlorine, it will affect the taste of your pickles. Use filtered water if your brine requires dilution (though this recipe uses straight vinegar for safety and punch).
- The Garlic Trick: If you notice your garlic turning blue or green inside the jar, don’t panic! It’s a reaction between the sulfur compounds in the garlic and the acid in the vinegar. It is perfectly safe to eat. To prevent it, blanch your garlic cloves in boiling water for one minute before adding them to the jar.
- Spice It Up: If you are wondering how do you make pickled peppers with more complexity, try adding a singular star anise or a cinnamon stick to the brine. It sounds strange, but it adds a subtle, warming background note often found in high-end charcuterie pickles.
- Sanitization: Even though we aren’t water-bath canning, you should always start with squeaky-clean jars. Run them through the dishwasher on the “sanitize” cycle right before using.
Storage & Reheating
Since this is a refrigerator pickle, proper storage is key to longevity.
- Storage: Once cooled, seal the jars tight and place them in the coldest part of your refrigerator (usually the back). They will taste good after 24 hours, but they hit their peak flavor around day 3 or 4. They will keep fresh and crunchy for up to 2 months.
- Freezing: Do not freeze these. Freezing causes the water inside the cucumber cells to expand and burst the cell walls. When you thaw them, you will be left with a mushy, unappetizing sludge.
- Reheating: Never reheat the pickles themselves. If you are using the leftover brine for a marinade (which you absolutely should!), you can heat the liquid, but keep the veggies cold.
Serving Suggestions
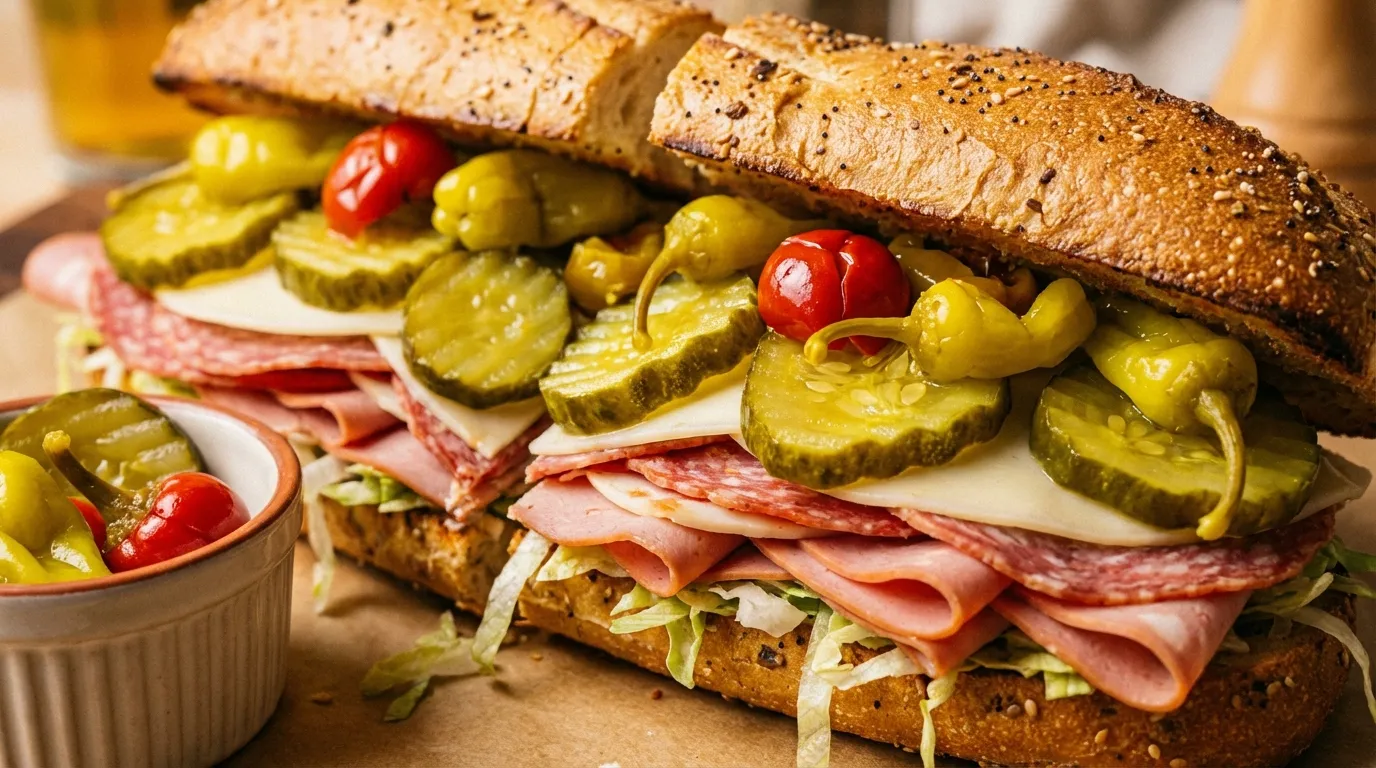
This pickles and peppers recipe is incredibly versatile. While I admit to eating them straight out of the jar while standing in front of the fridge at midnight, they shine when paired with rich, fatty foods. The acidity cuts through grease perfectly.
- The Ultimate Sandwich: These are the perfect topping for an Italian sub. In fact, if you want to create a meal that will impress anyone, you should make my favorite Grinder Sandwich Recipe and pile these pickles high on top. The vinegar interacts with the creamy dressing in a way that is simply magical.
- Burger Night: Swap out standard dill chips for these. The addition of the peppers adds a layer of heat that standard pickles lack.
- Charcuterie Boards: The bright yellow and green colors pop visually against cured meats and soft cheeses like Brie or Camembert.
- Bloody Mary Garnish: Skewer a few coins and pepper rings for a brunch cocktail that looks professionally made.
Conclusion
Making your own condiments is one of the easiest ways to feel like a pro in your own kitchen. There is no mystery to it—just good produce, the right ratio of acid to salt, and a little bit of patience. This pickles and peppers recipe delivers a crunch and flavor profile that mass-produced brands simply cannot replicate.
Once you master this base, you can start experimenting. Throw in some cauliflower, maybe some carrot sticks, or dial up the heat with Habaneros. But start here. Taste the difference that a simple ice bath and fresh herbs make.
Did you try this recipe? I’d love to hear how it turned out! Leave a comment below and let me know if you went spicy or sweet.
Common Questions About Pickles and Peppers Recipe
Can I use this recipe for canning?
I do not recommend this specific recipe for long-term water bath canning. The vinegar-to-water ratio and the texture of the vegetables are optimized for refrigeration. Heat processing (canning) would cook the cucumbers further, likely making them soft.
My garlic turned blue. Is it safe?
Yes, absolutely. As mentioned in the tips, this is an enzymatic reaction between sulfur and acid. It looks odd, but it doesn’t affect the flavor or safety of your pickles and peppers recipe.
How do you make pickled peppers spicier without changing the flavor?
If you want heat without altering the vinegar profile, add dried red chili flakes or a pierced Habanero pepper to the jar. Piercing the pepper allows the spicy oils (capsaicin) to infuse the brine without you having to eat the actual pepper.
Why are my pickles mushy?
Mushy pickles usually happen for three reasons: the cucumbers were old/soft to begin with, the blossom end wasn’t removed (enzymes!), or you skipped the ice bath step. Stick to the protocol, and you’ll get that crunch.
What is the difference between pickled peppers and standard pickles?
Standard pickles generally refer to cucumbers. Pickled peppers specifically refer to the preservation of capsicum varieties. This recipe marries the two for the best of both worlds.